Install dynamic LED turn signals
List of necessary tools:
- 1 Pack of 2 sequential LED indicators
- 1 ratchet
- 1 box of sockets
- 1 Electrician's tape
- 1 soldering iron
- 1 Tin coil
- 1 Cutter
- 1 Voltmeter

1. Remove the bumper
Arm yourself with your ratchet and dismantle the bumper. The disassembly method varies depending on your vehicle.
2. Disassemble the headlight
Still with the ratchet, remove the headlight. Usually the headlight is fixed with 3 screws. Take it out of its location to have the back wires within reach.
3. Tinning of wires
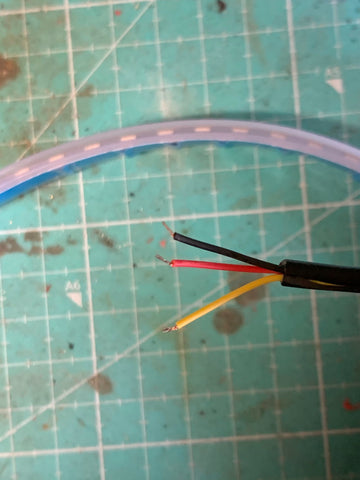
Using your soldering iron, tin the 3 wires of the flashing light. The 3 wires correspond to:
- Red: (+) Power
- Black: (-) Power
- Yellow: (+) Blinkers

To tin the wires, melt some tin on the iron and place the molten tin on the copper end of the wire.
4. Test the headlight wires
Cut the wires with the cutter to have the copper exposed. With the voltmeter, test the wires. In the case of a Clio 2:
- Black = (-) Ground
- Yellow = (+) Low beam
- Purple = (+) Flashing
- Green = (+) High beam
- Blue = (+) Position light

5. Solder the wires
In this tutorial, we are going to make sure to turn on the LED daytime running lights when we turn on the parking lights, and the indicators will come on when we activate the stalk.
To do this, you will have to solder the wires of the LED indicators in this way:
- Red - Position light lead
- Black - Black ground wire
- Yellow - flashing light wire
To have the daytime running light that comes on when the ignition is switched on, you will need to find a nearby (+) wire using your voltmeter that passes current when the ignition is on.

6. Insulate the wires
Insulate the welds with the electrician's tape as in the photo of the previous step.
8. Go up the lighthouse
Now that all your wires are soldered and insulated, you can reassemble the headlight by passing the LED turn signal wire through the back of it, so that the turn signal can be installed under the headlight.
9. Glue the turn signals under the headlight
Peel off the strip on the 3M adhesive and glue the LED turn signal along the headlight, so that it ends up in the space between the headlight and the bumper.
10. Repeat steps 3 to 8 on the other headlight
11. Reassemble the bumper
Refit the bumper, being careful to pass it under the turn signals.
14. Admire the result
If everything has been done correctly, by switching on the position light, the LED daytime running lights should come on, with the animation. By activating the turn signal stalk, they must also light up dynamically.


1 comments to
Bonjour, votre produit m’intéresse mais j’aimerais savoir si le pour type arrière que vous proposez, la couleur est-elle rouge de chez rouge, ou est-elle orangée.
Je vous pose la question car la norme nous impose la couleur orangée.
En vous remerciant.
Cordialement.
M. Martin